Tools and Materials Needed for Installation
Essential Tools for Mounting Mud Flap Brackets
Putting in mud flap brackets for semi trucks calls for simple but key tools. Begin with a set of wrenches. Or use a ratchet and socket set. These help tighten nuts and bolts. They hold the brackets to the truck frame. If your truck frame lacks pre-drilled holes, get a power drill. Pick bits that work on metal. Choose bits that fit the size of your bolts. This gives a tight fit.
A measuring tape matters a lot. It helps place the mud flap brackets for semi trucks evenly on both sides of the truck. This setup looks good. It also works right. If the install is not even, flaps might drag. Or they could bump the tyres.

Recommended Materials for a Secure Fit
To stop rust later and make the setup last, always pick stainless steel bolts and nuts. Rust can make fasteners weak over time. This happens fast in bad weather. Or on roads with salt in winter.
Lock washers are important, too. They keep the mud flap brackets in place. Vibrations or bumps on the road cause loosening. But these washers stop that. Put anti-seize lubricant on the bolts. It is a good idea. This makes taking them out easier next time. It also stops bolts from sticking due to water or rust.
Preparing the Truck for Installation
Choosing the Correct Mud Flap Hanger Type
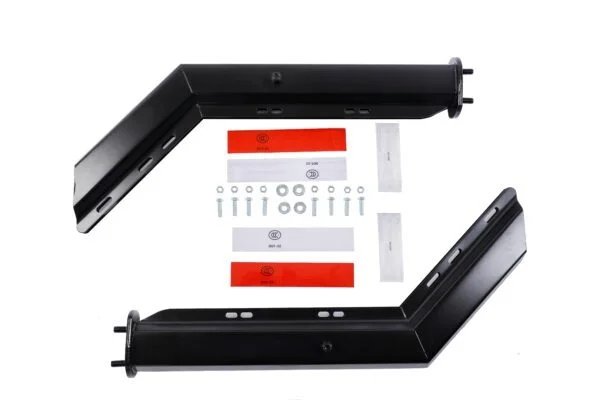
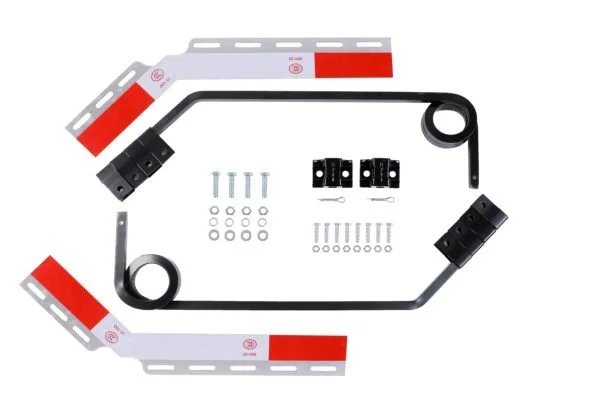
Pick the right semi truck mud flap hanger before you start. Base it on your truck’s setup. For big heavy trucks, try angled types. The Angled Heavy Duty Mud Flap Hanger Set | XKJ-MFH-01-SS-1/8 gives good space and strength. If you want a safety light feature, look at the Black Mud Flap Hanger Set with Reflector Tape | XKJ-MFH-03-1/8.
Each type of hanger has its own hole patterns. The arms are different lengths, too. So match them to your truck’s frame. Also, fit them to the size of your mud flaps.
Positioning the Mud Flap Brackets Accurately
Good spots for mud flap brackets help them work well. Measure from the tyre’s outside edge. Go back toward the rear. This way, the mud flap won’t touch the tyre. It stays clear during turns or when the truck bounces. Rules often say mud flaps must hang close to the ground. Usually no more than 8 inches away.
Now mark spots on both sides of the frame. Use chalk or a marker that stays. Check all measures twice for evenness. This makes your mud flaps match. They will work as they should.
Mounting the Mud Flap Brackets
Drilling or Aligning Pre-drilled Holes
See if your truck has old holes from past mud flap hangers. If yes, use them again. This saves time. But make sure they line up with your new hanger.
If you need to drill fresh holes, follow your marks. Keep both sides at the same height. Measure the same distance from the main points. Like the axle centre or fender sides. This keeps things looking balanced. It also holds the structure strong.
Attaching the Truck Mud Flap Brackets Securely
When holes are set, put each bracket on the frame. Slide stainless steel bolts through the bracket holes. Go into the frame, too. Add lock washers and nuts to every bolt. Tighten with your ratchet or wrench. Do it firm.
Before you tighten all the way, step back. Look to see if each bracket sits level. Check for an even match across the truck. A small off spot can cause problems. It might wear out one side too soon.
For more strength over time, add anti-seize compound to all threads. Do this before you tighten. It helps with care later on.
Installing the Mud Flaps onto the Hangers
Securing Mud Flaps to Brackets Properly
With your semi truck mud flap hangers set firm, add the mud flaps now. Line up the ready holes in the flap. Match them to the hanger arms. If you need to, drill holes in the flaps. Use a bit for metal.
Pick hardware that fights rust. Stainless steel is best. Use it to hold each flap. Tighten the bolts well. But do not go too hard. That could break the rubber. Or bend the metal arms. Good picks for tough use are PB 24×36 inch Mud Flap (SKU: XKJ-MF36PB-4). Or try FB 24×30 inch Mud Flap (SKU: XKJ-MF30FB-6). They have surfaces that stop splashing. The texture is strong too.
Adjusting for Clearance and Functionality
After you fix the flaps, check where they sit. Look at the ground and tyres. The flaps should drop straight. They must not touch the ground. But stay low to stop junk from flying back.
Also, check the space between each flap and the tyre side. This stops rubbing on turns. Or when the truck hits bumps and squishes down. If needed, move the spots. Or change the arm angles a bit.
Final Inspection and Maintenance Tips
Verifying Stability After Installation
Give each bracket a handshake test. Pull it gently in different ways. If it moves between the bracket and frame, tighten bolts right away.
Look closely at the spots between the bracket plates and the truck frame. Gaps mean it did not sit right. This could make noise or wear out fast.
Ongoing Care for Truck Mud Flap Brackets
To make truck mud flap brackets last longer, check them often. Do it after trips off the road. Or after long drives. Look for rust marks. See if the metal arms have cracks. Check if the hardware is loose.
If bolts feel not as tight, use your wrench to fix them. From time to time, spray anti-rust on them. Or put lubricant on the bolts again. This keeps them good for years.
We know solid parts matter for your trucks. That is why we give products made to hold up. They work even in the worst spots. Dependable parts keep you safe. They cut down on stops and fix bills, too.
FAQs
How often should I check my mud flap brackets?
Look at them once a month. Or before a long trip. Watch extra after rough roads. Or in bad weather.
Can I reuse old mounting holes on my truck frame?
Yes, if they fit your new brackets. And if they look good. This saves time. It skips extra drilling.
How far should mud flaps hang from the ground?
Rules say no more than 8 inches from the ground. Check when the truck has no load. Measure to follow the law.
What size mud flap should I use?
Usual sizes are 24×30 inch (XKJ-MF30PB-3). Or 24×36 inch (XKJ-MF36PB-4). Pick by your truck size and how much area you need to cover.

